Please read the readme @ https://github.com/ucgmsim/IM_calculation/blob/master/README.md for instructions on how to run the code.
DONE
- IM calculations have been separated from the "old post-processing" repository, extracting the relevant functions and classes.
- IM values validated on Hypocentre and Kupe against "old post-processing" on the same data.
- Two types of workflows: text based (most likely observations) and binary based (simulations once the binary workflow is in place).
- If binary workflow does not happen soon, the text based option will be used in both cases.
- Outputs match the formats requested in File Formats Used On GM and should therefore be usable on the upcoming Non-ergodic codes.
Tested on very simple multi-process on Kupe with good speed-up using 40 and 80 cores. For the sample, 2228 stations were used
Machine Cores Time Hypocentre 1 132m Hypocentre 8 8.7m Kupe 40 27m Kupe 80
OUTPUT STRUCTURE
With command : python calculate_ims.py ../BB.bin b -o /home/yzh231/ -i Albury_666_999 -r Albury -t s -v 18p3 -n 112A CMZ -m PGV pSA -p 0.02 0.03 -e -c geom -np 2
- input file path: ../BB.bin
- b: input file type is binary
- -o: output result csvs location is /home/yzh231, default is /home/$user
- -i: unique identifier/runname of the simrun and output folder name are Albury_666_999, default is 'all_station_ims'. This attribute will be stored in the meta data file.
- -r: rupture name is Albury, default is unknown. This attribute will be stored in the meta data file.
- -t: type of simrun is simulated, default is unknown. This attribute will be stored in the meta data file.
- -v: version of simrun is v18p3, default is XXpY. This attribute will be stored in the meta data file.
- -n: station names used to perform im claculation are 112A and CMZ, default is all the stations in the binary file
- -m: measures used to perform im calculation are PGV and pSA, default is all the measures
- -p: period of pSA used to perform im calculation are 0.02 0.03, default is Karim's 15 periods
- -e: In addition to the period specified by -p option, use extended 100 period of pSA, default not using
- -c: component of waveform acceleration used to perform im calculation is geom, default is '090, 000, ver'
- -np: number of processors used to perform im calculation is 2, default is 2
The result is outputted to the following location, where:
- 'Albury_666_999' is the folder that contains all outputs. The folder name 'Albury_666_999' is made of the string specified by the '-i' argument. Default is 'all_station_ims' if not specified.
- 'Albury_666_999.csv' is the summary csv file that contains all stations' im calculations. The summary file name is made of the string specified by the '-i' argument.
- 'Albury_666_999.info' is the meta data file. The meta data file name is made of the string specified by the '-i' argument.
- 'station' is the folder that contains all individual station's im_calculations. The folder name is defaulted and cannnot be specified by the user.
- '112A_geom.csv' is the individual csv file that contains geom component im calculation for station 112A. Each name of the individual station csv file name is made of station_name + component

TEST FOR CALCUALTE_IMS.PY
All the steps below are to be carried out in hypocentre
1.Generate summary benchmark:
The following steps should only be performed once for each selected binary file
- Select a source binary file: /nesi/transit/nesi00213/RunFolder/daniel.lagrava/Kelly_VMSI_Kelly-h0p4_EMODv3p0p4_180531/BB/Cant1D_v2-midQ_leer_hfnp2mm+_rvf0p8_sd50_k0p045/Kelly_HYP01-03_S1244/Acc/BB_with_siteamp.bin
- Identify corresponding databse for the selected source binary file: /home/nesi00213/RunFolder/wdl16/database_old_pp/database.db
- Find the script to extract benchmark im value files from the database in step 2: /nesi/projects/nesi00213/dev/impp_datasets/extract_ims.sql
- Create a folder to store benchmark files. eg benchmark_im_sims
- Execute extract_ims.sql in database.db 4 times with specified components. eg: 'ver'

- Export results to benchmark_im_sims/benchmark_im_sim_ver.csv. Clik OK and don't change anything when 'Export data as csv' window prompts
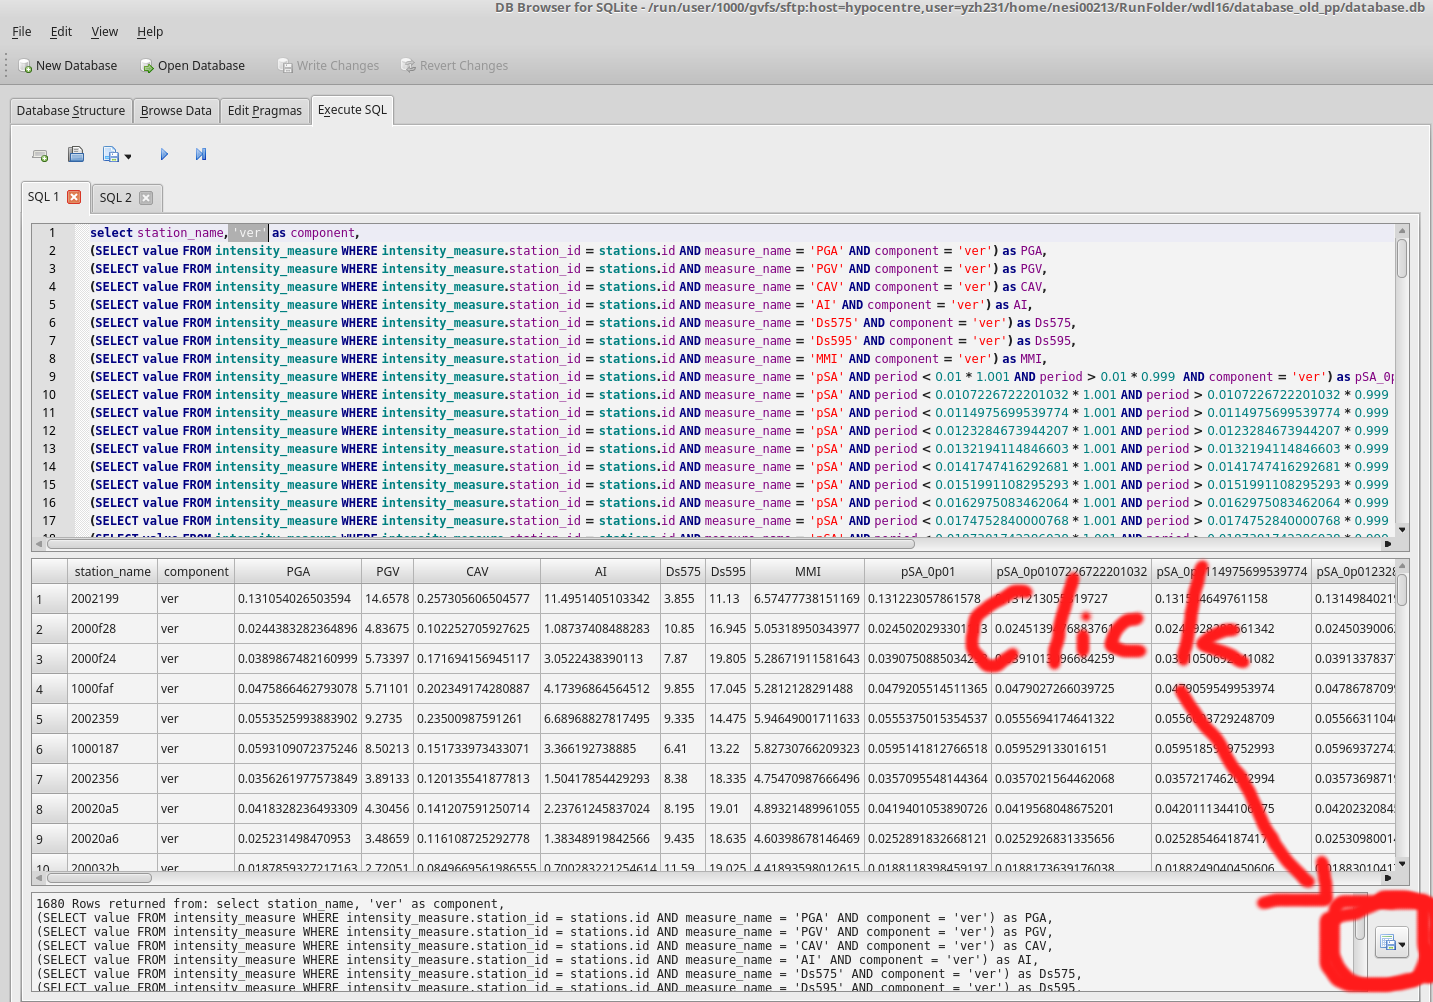

- Repeat step 4 and 5 with different components: '090', '000', 'geom'
- Now you have 4 summary benchmark files benchmark_im_sim_090/000/ver/geom.csv
2.Generate test input files
Follow the instruction in Binary Workflow FAQ, we can generate single waveform files. These waveforms are intended for the testing of ascii functionality of calculate_ims.py. Open a python cell
from qcore.timeseries import BBSeis
bb = BBSeis('/nesi/transit/nesi00213/RunFolder/daniel.lagrava/Kelly_VMSI_Kelly-h0p4_EMODv3p0p4_180531/BB/Cant1D_v2-midQ_leer_hfnp2mm+_rvf0p8_sd50_k0p045/Kelly_HYP01-03_S1244/Acc/BB_with_siteamp.bin')
bb.all2txt(self, prefix='/home/$user/benchmark_im_sim_waveforms/', f='acc'):
Now we have all the wavefoms.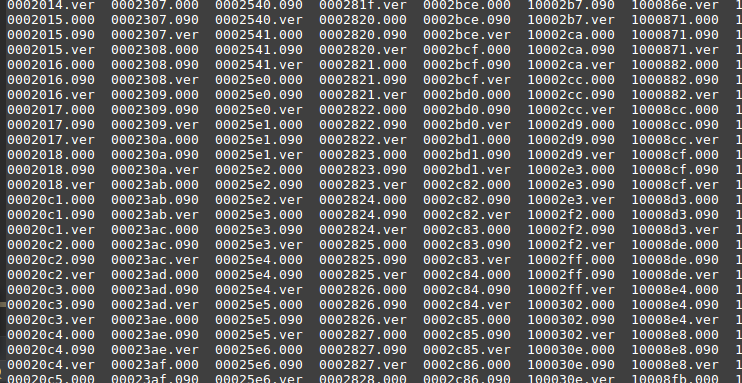
3. Create Test Folder
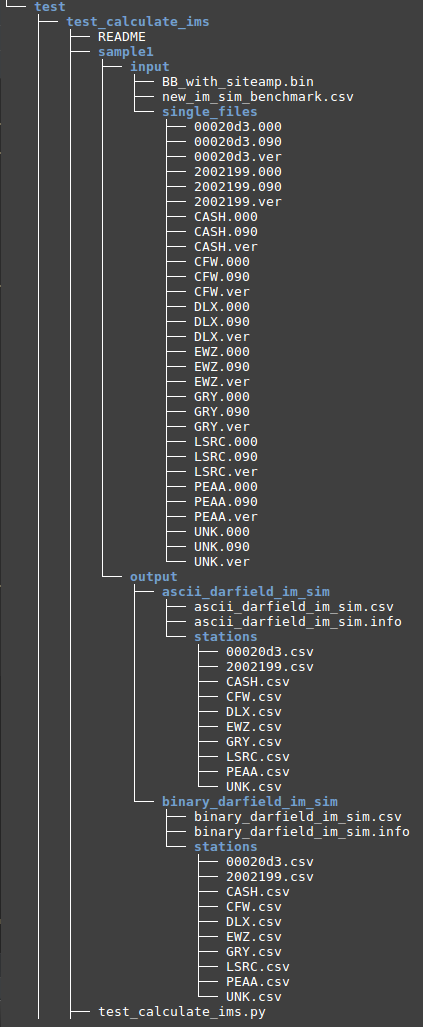
- Create The test folder structure follows Testing Standards for ucgmsim Git repositories
- Select 10 stations you want to test and cp corresponding waveforms files to the singel_files directory as below
- Copy the source binary file 'BB_with_siteamp.bin' to the input folder
- Run 'write_benchmark_csv(sample_bench_path)' function inside test_calculate_ims.py to generate 'new_im_sim_benchmark.csv', where 'sample_bench_path' is the folder we created in 1.4 Generate summary_benchmark: benchmark_im_sims. This function should only be run once for each binary file.
NOW you have all the input files ready
4. Run Pytest
Make sure you are currently under the test_calculate_ims folder, run: pytest -v -s test_calculate_ims.py

CHECKPOINTING & SPLITTING A BIG SLURM
Checkpointing
Checkpointing is needed for IM_calculation due to large job size and limited running time on Kupe. Therefore, we implemented checkpointing to track the current progress of an im_calculation job, and carry on from where the job was interrupted by slurm.
To run checkpointing, first git clone the IM_calculaiton repo, then check out the checkpoint branch
$ git clone https://github.com/ucgmsim/IM_calculation.git
$ git checkout checkpoint
Now. open im_calc_sl.template, change the IMPATH variable (line 22) to where you have cloned the git repository
# open template
~/IM_calculation-[checkpoint]$ vim im_calc_sl.template
# modify the $IMPATH
export IMPATH=/home/melody.zhu/IM_calculation
Note, the checkpointing code relies on the input/output directory structure specified in the im_calc_al.template in the checkpoint branch. Failure to match the dir structure will result in runtime error. A quick fix would be modifying the template to suit your own dir structure.
Example:
Input/output structure defined in im_calc_al.template

Actual input data structure:

The input binary is under:
/nesi/nobackup/nesi00213/RunFolder/Cybershake/v18p6_batched/v18p6_1k_under2p0G_ab/Runs/BlueMtn/BB/Cant1D_v3-midQ_OneRay_hfnp2mm+_rvf0p8_sd50_k0p045/BlueMtn_HYP28-31_S1514/Acc/BB.bin
The output folder is under:

Sample command to run checkpointing:
$ python generate_sl2.py -s /nesi/nobackup/nesi00213/RunFolder/Cybershake/v18p6_batched/v18p6_1k_under2p0G_ab/Runs -srf /nesi/nobackup/nesi00213/RunFolder/Cybershake/v18p6/Runs/test_srfs/ -ll /scale_akl_nobackup/filesets/transit/nesi00213/StationInfo/non_uniform_whole_nz_with_real_stations-hh400_v18p6.ll -np 80 -o . /nesi/nobackup/nesi00213/RunFolder/Cybershake/v18p6/test_check_point/ > test.sl
To submit the slurm script:
$cp test.sl /nesi/nobackup/nesi00213/tmp/auto_preproc
$sbatch test.sl
The reason that we have to run test.sl under '/nesi/nobackup/nesi00213/tmp/auto_preproc' is otherwise slurm cannot find machine.env specified by the test.sl script

Splitting a big slurm
Splitting a big slurm script into several smaller slurms is need due to maximum number of lines allowed in a slurm script on Kupe.
Still in the checkpointing branch, Run the generate_sl3 script that uses both checkpointing and splitting. The -ml argument specifies the maximum number of lines of python call to calculate_ims.py. Header and footer like #SBATCH --time=15:30:00, date etc are not included.
Say if the max number of lines allowed in a slurm script is 1000, and your (header + footer) are 30 lines, then the number that you passed to -ml should be 967. eg. -ml 967.
Example:
We have 320 simulation dirs to run, by specifying 100 python calls per slurm script, we expect 4 slurm scripts to be outputted.
1-100, 100-200, 200-300, 300-320
Command:
python generate_sl3.py -s /nesi/nobackup/nesi00213/RunFolder/Cybershake/v18p6_batched/v18p6_1k_under2p0G_ab/Runs -srf /nesi/nobackup/nesi00213/RunFolder/Cybershake/v18p6/Runs/test_srfs/ -ll /scale_akl_nobackup/filesets/transit/nesi00213/StationInfo/non_uniform_whole_nz_with_real_stations-hh400_v18p6.ll -np 80 -o . /nesi/nobackup/nesi00213/RunFolder/Cybershake/v18p6/test_check_point/ -ml 100
Output:
Todo: tidy up the check_point.py, generate_sl[*|1-2].py
TODO
- Creation of semi-automatic slurm generation that will have all the calls to produce the results as needed.
- Progress printing statements
- Sim ASCII calculation - currently assumes ASCII file is in g for acceleration but this is not the case for sim
- Rrup calculation on a smaller station list - currently when generating the slurm script it does the full grid even for stations outside the domain
Notes
- Extensive re-writing of code needs to have smaller deliverables in the future, as this simplifies the integration.