Endnote Installation Instructions
On Campus installation
Step 1.
Ensure that Microsoft Word is Closed
Step 2.
Back up and existing Endnote libraries. (Ensure that any .enl file and .data folder are kept together)
Step 3.
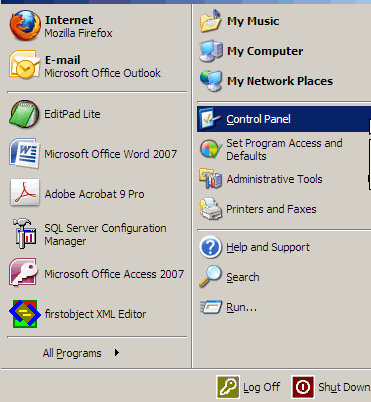
Click on the Start button and select Control Panel
Step 4.
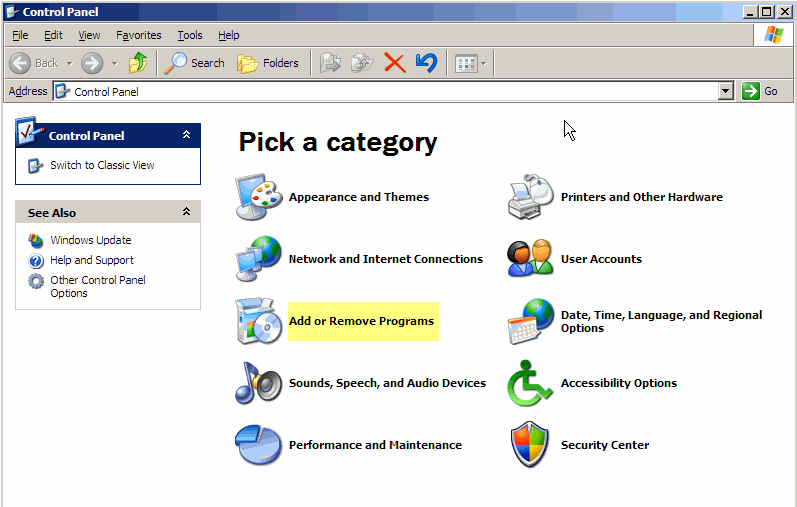
Select Add/Remove Programs
This screen varies in look, depending on your settings.
Step 5.
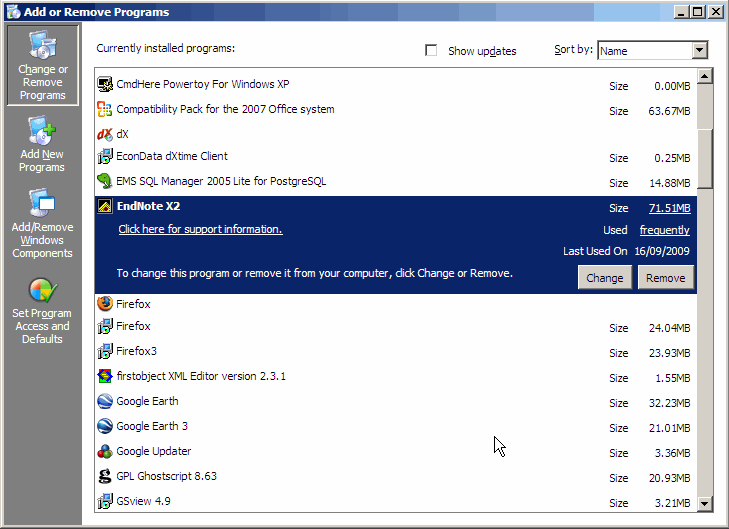
Check to see whether an earlier version of Endnote is listed. If it is, Click on it then click on the Remove option.
Step 6.
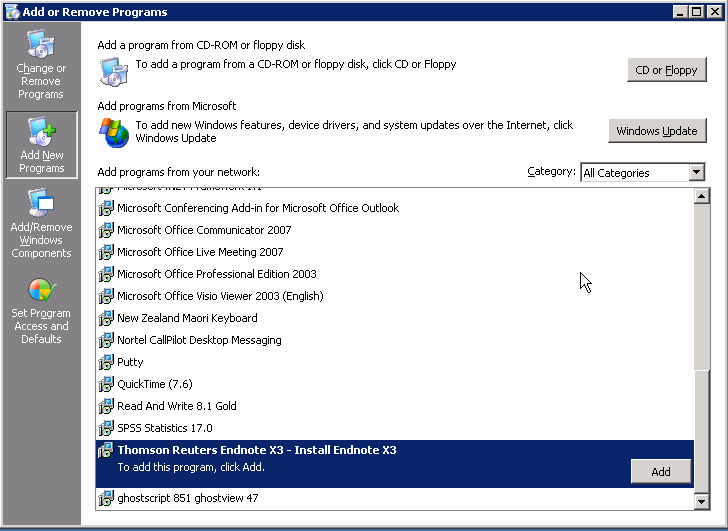
Click on the Add New Programs button and select Thompson Reuters Endnote X3. Click on Add to start the installation. Warning: in some cases the list may show as Endnote X3 ... rather than as Thompson Reuters ...
Step 7.
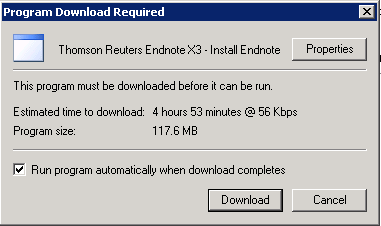
The next window is deceptive. On campus the download will only take a minute or two, not the 4 plus hours suggested. Tick the Run program automatically when download completes box.
Step 8.
The download will complete and the download box will disappear. At this stage Endnote will be installing in the background. You can shut down the Control Panel windows. Don't open Word for about 5 minutes, at which stage you should see Endnote X3 in your Start, Programs folder.
- start Endnote
You will notice on first start-up that you are prompted to link to EndnoteWeb. Do not integrate with Endnote Web
- open or create a new Endnote Library
Step 9.
Start Word and check the Endnote tab is present.
Step 10.
Once you have finished. Logoff to ensure that your roaming profile is updated with the EndNote X3 information.
