Here is a list of the software where we run SeisFinder and how to perform certain operations on it.
As of Jan 2018, we have the two following Virtual Machines (VMs):
- dev01-quakecore.canterbury.ac.nz (external web access via http://quakecoresoftdev.canterbury.ac.nz/seisfinder)
- Development machine.
- This machine has a mount for the RCC hard drive on /rcc/home. There is a lot of diskspace here, so we can probably put most of the CyberShake data here.
- ucquakecore1p.canterbury.ac.nz (external web access via http://quakecoresoft.canterbury.ac.nz/)
- Production machine.
- Reduced disk space. It would need to mount RCC storage to be able to serve SeisFinder v2. For the moment being, we will not use it.
User Management
Active Directory is up and running on those machines. This means that any UC user can be allowed to have access to the machines. In order to do so, any user with root access can perform the following command:
sudo realm permit $usercode
where $usercode is the UC code for the user (for example ykh22 for Jonney).
Installation of SeisFinder2
In a first instance, we have installed SeisFinder v2 on dev01-quakecore. This is the machine where our beta testers will use it.
To start testing on dev01-quakecore, enter:
$ssh username@dev01-quakecore
username@dev01-quakecore:~$ cd /var/www/seisfinder2
And go straight to Step 6 in the following installation instruction.
If you wish to test on your local machine, please follow the instructions from Pre-requirements.
Pre-requirements
The following version of software must be installed:
PostgresSQL 9.5.8
PostGIS 2.2.1
Python 2.7.12
Django 1.10.0
you have 7.5 hours
$ pip install --update django==1.10.0
1.Getting the code
Open a terminal and git clone the source code to your local directory.
# https
$ git clone https://github.com/ucgmsim/seisfinder2.git

# SSH
$ git clone git@github.com:ucgmsim/seisfinder2.git
$cd seisfinder2
/seisfinder2 $ python manage.py runserver
If you clone the files successfully, you should be able to see something similar to this:

2.Setting up the database
To set up the seisfinder2 database in PostgreSQL. Open a terminal and do:
# open postgres
$ sudo su - postgres
postgres@user-desktop ~ $ psql

# create database
postgres=# CREATE DATABASE seisfinder2;

# create user
postgres=# CREATE USER www WITH PASSWORD 'seisfinder';

# Do the following alter regardless the user alreday exists or not
postgres=# ALTER ROLE www SET client_encoding TO 'utf8';
postgres=# ALTER ROLE www SET default_transaction_isolation TO 'read committed';
postgres=# ALTER ROLE www SET timezone TO 'UTC';

# grant privilege
postgres=# GRANT ALL PRIVILEGES ON DATABASE seisfinder2 TO www;

# connect to the seisfinder2 database you just created
postgres=# \c seisfinder2

# create postgis extension
seisfinder2=# CREATE EXTENSION postgis;

# exit
seisfinder2=# \q
postgres@user-desktop ~ $ exit
3.Migrate data structure from Django to database
$ cd seisfinder2

# delete migration cache if exits
/seisfinder2$ rm -rf seisfinderapp/migrations

# apply migrations to database
/seisfinder2$ python manage.py makemigrations seisfinderapp
/seisfinder2$ python manage.py migrate
To see if all the tables are correctly migrated, do:
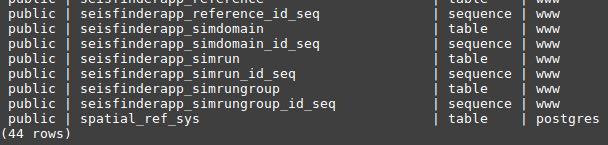
$ sudo su - postgres
postgres@user-desktop ~ $ psql
postgres=# \c seisfinder2

#list all the tables
seisfinder2=# \d+
You should be able to see 44 rows if the migration is successful.
4.Getting the CSV and Hazard data files
Sample CSV and Hazard data for populating the database are located at username@dev01-quakecore:/rcc/home/projects/quakecore/seis2Data.
Type the following command and come back after lunch.
# First, create a folder called 'private' under your git repository seisfinder2
$ cd seisfinder2
/seisfinder2$ mkdir private

# Then create a folder called 'data' under private/
/seisfinder2$ cd private
/seisfinder2/private$ mkdir data

# General copy command: scp -r username@remoteserver:remote_path_to_copy_files local_path_to_put_copied_files
# add sudo if permission denied
# if still permission denied, type the following command in the dev01-quakecore server to change permssion
username@dev01-quakecore $ sudo chmod 755 /rcc/home/projects/quakecore/seis2Data/private/data/cybershake17p8_csv

# Now copy files from remote server to your local machine
# cybershake17p8 csvs
scp -r gg999@dev01-quakecore:/rcc/home/projects/quakecore/seis2Data/private/data/cybershake17p8_csv home/gg999/seisfinder2/private/data/

# darfield csvs
scp -r gg999@dev01-quakecore:/rcc/home/projects/quakecore/seis2Data/private/data/darfield_csv home/gg999/seisfinder2/private/data/

# hazard data
scp -r gg999@dev01-quakecore:/rcc/home/projects/quakecore/seis2Data/private/data/hazard home/gg999/seisfinder2/private/data/

# event data
scp -r gg999@dev01-quakecore:/rcc/home/projects/quakecore/seis2Data/private/data/event home/gg999/seisfinder2/private/data/
5.Inserting the CSV and Hazard and Event data to seisfinder2 database
(1) First, start the Django server
$cd seisfinder2

# if running local host
/seisfinder2 $ python manage.py runserver

# if running from the dev01-quakecore server
# first change file permission if permission denied use:
/seisfinder2 $ sudo chmod 755 /rcc/home/projects/quakecore/seis2Data/private/data/cybershake17p8_csv
# then
/seisfinder2 $ sudo python manage.py runserver 132.181.39.127:8000

# else use 'ifconfig' to figure out the IP address of your server
(2) Now the server is running, let's insert cybershake17p8 CSV data.
Open a browser, go to the following address and the insertion will start automatically, you'll see lots of terminal output.
# The 'root_dir=' is the absolute path where you just put the copied data in step 4. Eg.

# local host:
http://127.0.0.1:8000/seisfinderapp/insert?root_dir=home/gg999/seisfinder2/private/data/cybershake17p8_csv&type=cybershake

# dev01-quakcore:
http://132.181.39.127:8000/seisfinderapp/insert?root_dir=/rcc/home/projects/quakecore/seis2Data/private/data/cybershake17p8_csv&type=cybershake
After about 9 minutes, if the CSV data is inserted successfully, terminal output: final result=OK.
And you should get 11458 if performing the following sql command in postgres

Repeat the same procedure for inserting darfield csv data with the following code:
# local host:
http://127.0.0.1:8000/seisfinderapp/insert?root_dir=home/gg999/seisfinder2/private/data/darfield_csv&type=historic

# dev01-quakcore:
http://132.181.39.127:8000/seisfinderapp/insert?root_dir=/rcc/home/projects/quakecore/seis2Data/private/data/darfield_csv&type=historic
After terminal output 'final result= OK', type the following command in postgres and you should get two rows like this:

(3) Now let's insert hazard data. Doesn't matter if the Django server is running or not.
/seisfinder2 $ cd sqlsts

#inserting hazard data
/seisfinder2/sqlsts $ python insert_hzd_paths.py home/gg999/seisfinder2/private/data/hazard
if the insertion of the hazard data is successful, you should get 8534 when performing the following sql command

(4) Now we insert event data. Doesn't matter if the Django server is running or not.
#inserting event data
/seisfinder2/sqlsts $ python insert_acc_path.py home/gg999/seisfinder2/private/data/event
After insertion, type the following command in postgres and you should get 1 row.


6.Testing
Now you've finished all the installation steps. Let's do some test to see if the python scripts can run with the database smoothly. The two scripts that need to be tested are hazard_search.py and event_search.py:
(1) To see the detailed usage of hazard_search.py and event_search.py, type:
/seisfinder2/sqlsts $ python hazard_search.py -h

/sesifinder2/sqlsts $ python event_search.py -h
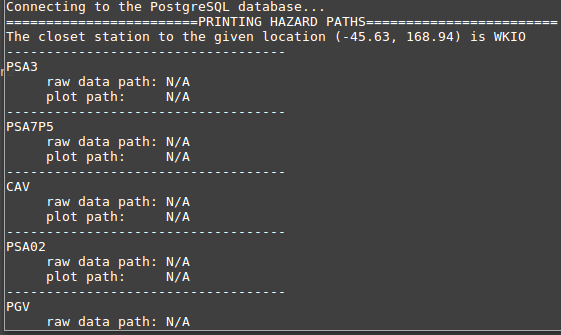
(2) Sample test for hazard_search.py
$cd seisfinder2/sqlsts
seisfinder2/sqlsts $ python hazard_search.py -q Cybershake17p8 -45.63 168.94
Output:
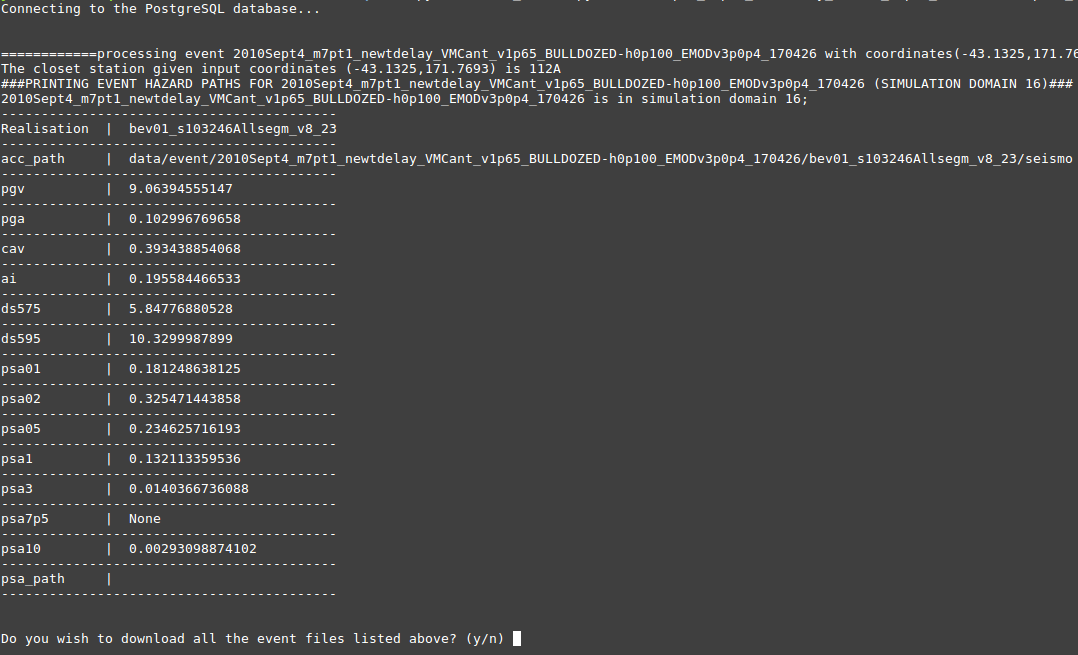
(3) Sample test for event_search.py
seisfinder2/sqlsts $ python event_search.py -e 2010Sept4_m7pt1_newtdelay_VMCant_v1p65_BULLDOZED-h0p100_EMODv3p0p4_170426 -c -43.1325 171.7693 -r bev01_s103246Allsegm_v8_23
Output: